
What you need
Wooden letter
Mod Podge
Acrylic paint
Foam brushes
2 coordinating pieces of patterned scrapbook paper
Various embellishments
paper flowers, brads, buttons, etc
Several 10″ pieces of coordinating ribbon
Glue dots
Ink Pad and sponge (optional)
Pencil, scissors
Sponge brushes, plastic cups
Instructions
Using a large unfinished wooden letter from the craft store (the sample letter is approximately 6″x 5″ lay the wooden letter face down on the back side of both pieces of your patterned paper and using a pencil trace around the front raised edge of the letter.
Cut out both pieces of traced patterned papers just inside traced lines and then cut pattern paper letters in “half” horizontally, you’ll piece them together later on the front of the letter.
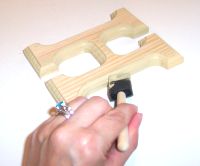
Pour some acrylic paint into a plastic cup and using a foam brush paint just the side edges of the wooden letter with acrylic paint, let the paint dry.
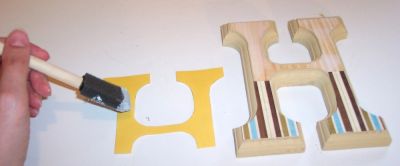
Using another foam brush apply Mod Podge to front raised area of the wooden letter and to the back of the cut out pattern papers and apply them to the front of the wooden letter, overlapping if necessary and smoothing out any air bubbles with your fingers, then let dry. If any paper overhangs the edges use your scissors to trim it off.
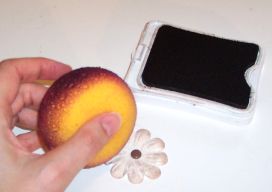
If desired tap a sponge onto a stamping ink pad and then apply ink around edges of wooden letter for an aged look.
Using a foam brush apply one or two coats of Mod Podge over papers to seal, let dry in between layers.
If desired use a sponge and stamping ink pad to apply ink onto paper flowers.
Tie and knot different ribbons around letter.
Attach embellishments such as paper flowers, buttons, brads, etc with glue dots to the front of the letter and you’re done.
With all the different pattered papers and embellishments out there your letter can be totally different and unique!
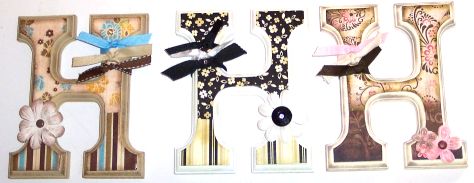
Altered Letter Finished


Just be careful with the Mod Podge as I found it very easy to bubble the paper. Fortunately you can embellish right over those parts 🙂 Super cute results!
Just Beautiful! I am going to cut the letters myself, but thanks to you, they will be decorated much better than just some paint!
Instead of cutting the paper to fit the letter shape, glue it with an over hang and then with a very fine sandpaper block go around the edges of the letter causing the paper to “cut” away from the edge of the letter.
Excellent work..!!
I Love it, Close to my Heart products ROCK!
very nice
wow this is so cool
Looks like a great, fun project!
Very Cool Project! I’m definately going to try this one!
Fun idea with great instructional photos.